Craft your own Bridesmaid Bracelets; Right-Angle Weave Bracelet Tutorial

This is a Tutorial to create simple, elegant bespoke bridal bracelets for your Bridesmaids on your special day. The bracelets look very cute with seed beads. But, if you wanted to go all out ”bling” then personally I would get yourself crafting with some shiny Swarovski Bicones. I look forward to seeing your posts on here with your beautiful makes!
Time Estimate: 1 to 2 hours
Equipment
Round Nose Pliers
Chain Nose Pliers
Side Cutters
Beading Mat
Materials
Clear Thread
Crimp Beads
Necklace Ends
Lobster Clasp
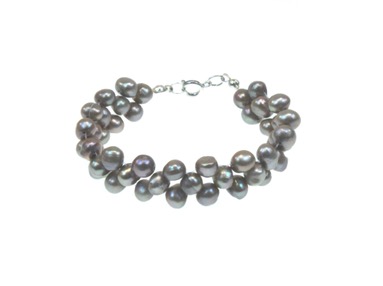
5 & 4 mm beads
Cellotape
Method
- Take two lengths of thread. Holding them together, add the necklace end and a crimp bead. Using the chain nose pliers, squeeze the crimp bead. Check that the two threads are secure and close the necklace end around the crimp bead.
- Thread one of the 3mm beads onto each of the clear threads. Taking the 4mm bead, and thread one thread one way through the 4mm bead and the other thread through the other way.
- Repeat the Pattern: Thread a 3mm bead on each thread and then thread through the 4mm bead.
- Repeat the pattern until you can fit the bracelet around your wrist.
- Necklace: Carry on the Beadwork to your required length.
- Clasp: To attach the clasp; thread the necklace end, then the crimp bead. Taking your chain nose pliers, squeeze the crimp bead in between the necklace end.
- Open the jump ring with the pliers. Rather than pulling the ring apart, move one plier one way, the other plier the other way. Add the Lobster Clasp then, close the ring.
- Place the jump ring with the Lobster Clasp into the hook of the Necklace end. Make the necklace end hook into a loop using the chain nose pliers.
I hope they turn out well for you. Enjoy creating your own bespoke bridal accessories.